Dockerizing a React App and deploying it to Production

In this article, we will be dockerizing our react application so that it can be made ready for the production server and the testing team. This will be a series of small steps assuming that you are already having knowledge of ReactJs and want to build a container file for your application
Step 1: Project Setup
I will be using my previous react application which I have developed. You can check my GitHub link for that
$ git clonehttps://github.com/RaghavJindal13/react-user-pages.git
$ cd react-user-pages
$ npm install
$ npm start
you will be able to see that react application on your browser using localhost:3000
Step 2: Adding Dockerfile
Open this project directory in your favorite code editor and then create a file named Dockerfile (note this is without any extension)

FROM node
RUN mkdir /usr/src/app
COPY . /usr/src/app
WORKDIR /usr/src/app
ENV PATH /usr/src/app/node_modules/.bin:$PATH
RUN yarn
CMD [“npm”, “start”]

Explanation:
- In the first line we are using official node image version 8, you can specify any other version specific to your project.
- We are using
react-buildwhich allows us name the first stage of build process which we will be using in stage 2 in production environment - In line 2 we are using our working directory as
app - In line 3 we copy everything into app directory.
- In line 4 and 5 we are installing all the dependencies from
package.jsonand building our app which creates the build artifacts inside /app/build
You must notice at line 3, we are copying everything into docker image and you think there is a problem here. Yes there is a problem, because this will copy everything including your node_modules into docker image, So we must use a .dockerignore file to get rid of this issue.
I used yarn instead of
npm, becauseyarnis faster than npm as you know when installing dependencies for a project, npm installs packages sequentially. This slows down the performance significantly. Yarn solves this problem by installing these packages in parallel.
Now create a .dockerignore file inside your root directory and put these following lines of code into it.
.git
node_modules
build
If you have more files to ignore, you can mention inside .dockerignore file.
Step 3: Build the image
Now open your terminal and navigate to the folder where you have created your Dockerfile
$ docker build -t docker-react .
$ docker run -it -p 3000:3000 docker-react
NOw open your localhost:3000 in your browser and you will see the fully working containerized react application.
Step 4: Pushing to Docker Hub
$ docker ps -aNote down the container id
$ docker commit 25fdgwe1q3q5 raghav131/docker-react
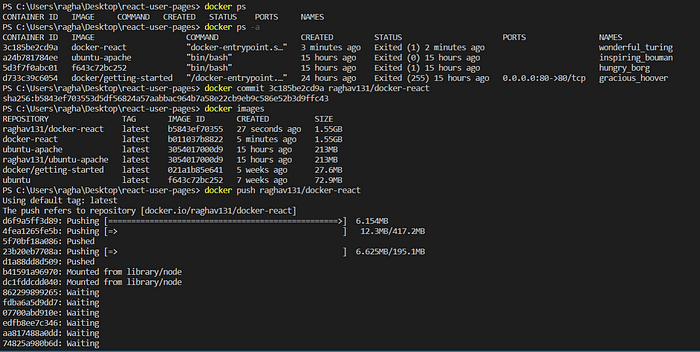
All set. Now just visit your docker hub account and there you will be able to see your freshly created docker image with a react application installed on it which can be further used for testing or deploying purposes.
